
Our wreath recently decided it had enough and fell off out door;-( I bought a few wreath forms before so this was a great time to dust it off and put it to good use.
My problem is TIME. I didn't want to spend too much time on this project. I plan on making a new one when I feel like I can spend a bit more time on it, but I think it is a fun one in the meantime.
I did some "shortcuts" with this project and I will tell you what these are...if you have the time I recommend you do it the right way just for its longevity. I just wanted some color on our door for now:)

(I know my door needs painted. Excuse the imperfections)
I will make a felt wreath very soon but I like this quick paper wreath with its gorgeous color for now.
Shortcut#1: You can use the book pages as is (not painted) and it will make your project faster! I, however had to take the longer route here because I am in love with this color.
Here is what I used for this project:
Book:
$0 (I picked one up from the local library's giveaway shelf a while ago for free) I used about 15-20 pages so don't think you need a think book like this:)

Wreath form.
$3.99
I used the straw one because that is what I had at home. Mine is the 14" one. Next time I will go for a bigger one. I like a more substantial wreath.

Acrylic paint
$1.99
I used this Martha Stewart one in Beach Glass. Gorgeous color.

Thumb tacks
$1
I ONLY used these because that is what I had at home. You can buy longer sequin pins or wreath pins in the craft stores and those will work better! These thumb tacks are way too short. The paper sticks much better if you have a longer pin.
TIP: to make it last as long as possible I will use the pin AND glue gun next time. It does take a bit longer but I will go the extra time for it to last a long time.

String
$0 (I had this at home but the dollar store sells something like this so at most this will coat you $1)
Depending on your style you can either use twine (which is what I used) or a satin ribbon...or anything of your choosing. I used this:

If you add up the prices of the supplies we are at: $6.99 Not too bad.
Here is the quick process of how I made it:
1. I tore the pages of the book out
2. I painted the book pages (one side only). I wasn't very careful. I deliberately didn't cover the entire page. The words were showing and I didn't go all the way out to the edges. You see that some of the petals have missing paint- but I like it that way. It adds to its rustic-ness.
KIDS: you can do this with your kids. They will love the paint job:)
3. I let the pages dry. Well...not fully. I am way too impatient to let them dry fully so I admit they were a little damp when I did this next step...

4. I first wanted to go with the bay leaf shape petals, but then decided to go with the round petals instead.
 |
| decided not to go with this. I am showing it in case you want to go with this shape. This is the shape you would cut and you can use the same technique I did here: |
5. This is the shape I went with:

and here is how I cut them so it is faster:
I put 2-3 pages together.

I folded them in half length-wise:

then I folded them in half again (length-wise)


6. depending on how big you want your circles to be (mine were about 1.75" in diameter) you will cut this strip into squares. I had enough space for 3 squares.


then I rounded off the edges. it is OK if your circles are not uniform. If you do want them to be uniform in size and shape then just use a round object and trace it then cut it. or better yet: use a hole puncher if you have one. I just cut it about the same. About is the key word here.


I didn't cut them all at once because I didn't know how many circles I needed. I just kept cutting more as I needed them. I didn't count them but the tacks had 300 pieces in them and looks like I used around half of them or maybe a bit more (so around 150-170):

7. I tied the string on the wreath form:

8. and started putting the circles on in a row:


I admit I am the worst at following recipes to the T so that translated into this as well. I deviated from the perfect row pattern but it still worked out ok.

just keep going round and round. It doesn't take that much time.
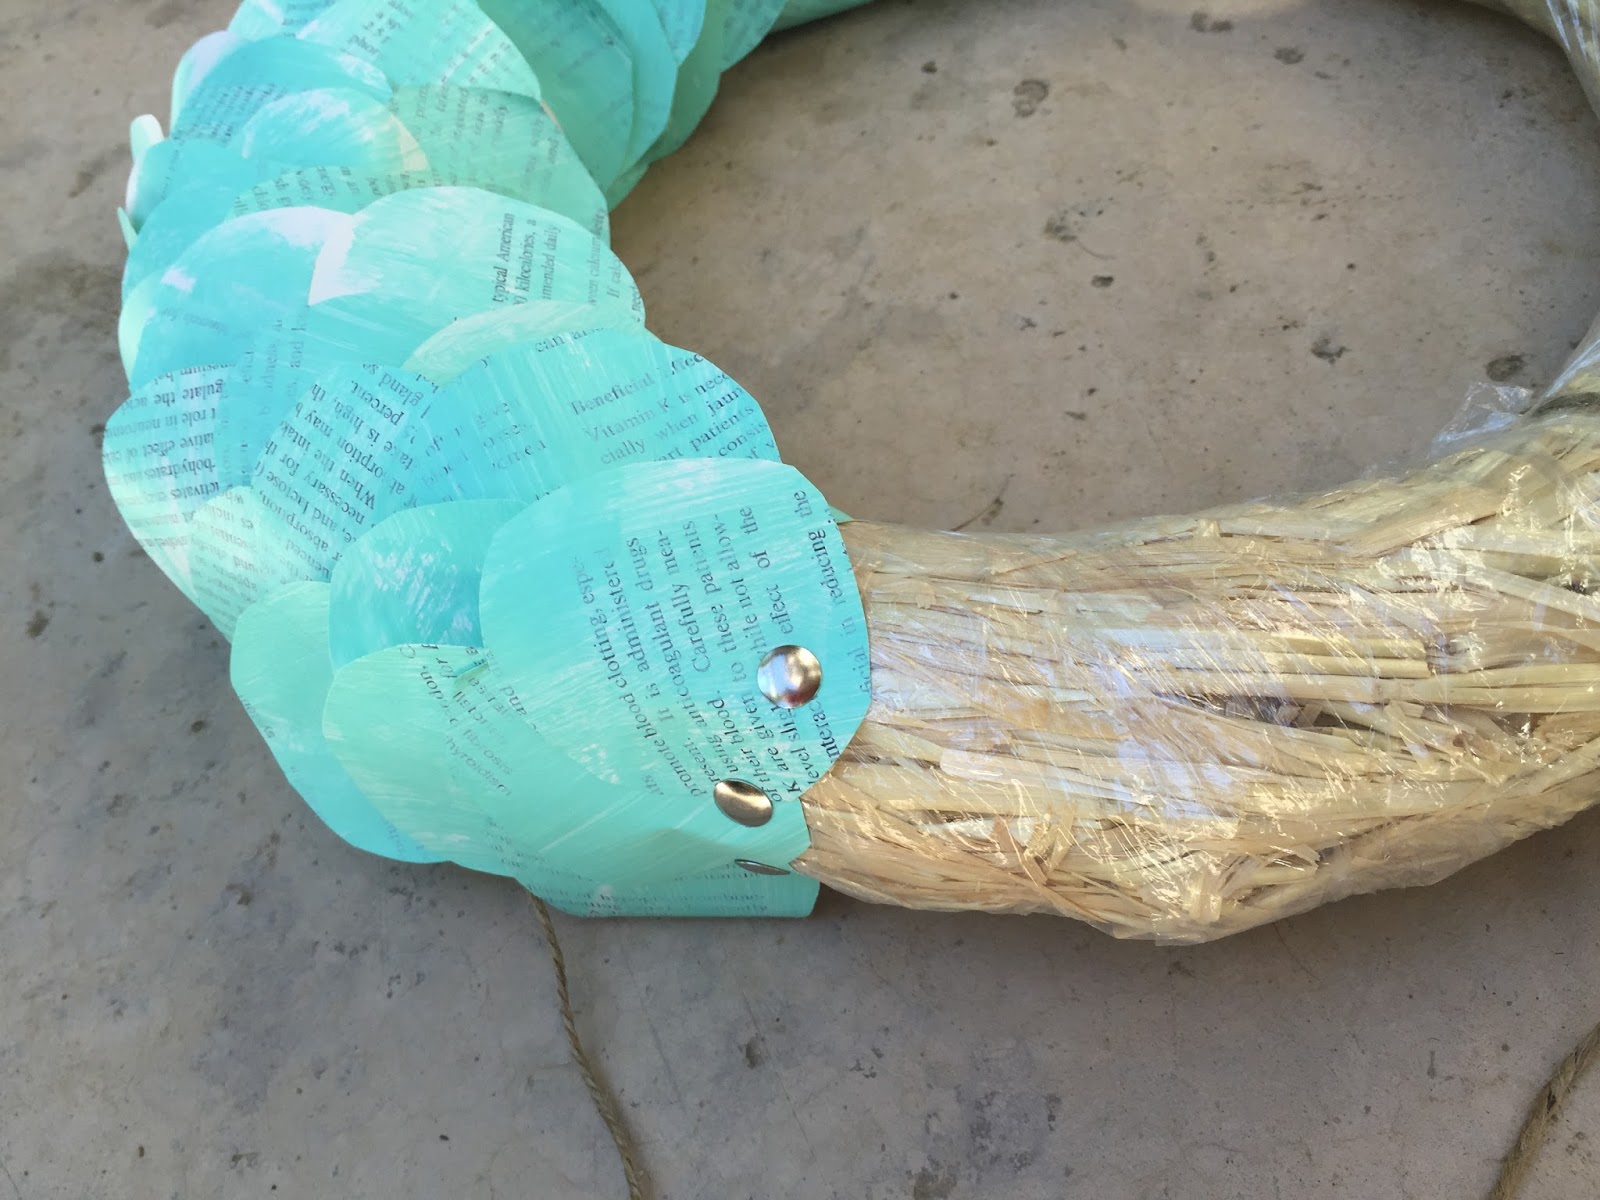
at the end just try to fit in the circles in the missing areas and reach under the petals to put the tacks in.
Then hang your creation and admire it.


details: see how the paint isn't even and it is still ok. The possibilities are endless with colors!!!!!!!


This took abut 1 hour. Again you can make yours faster if you don't want to paint the book pages:) But who can resist this yummy mint color?!
Enjoy! I will definitely make more wreaths! I'll post them as I do them (hope I won't forget to take pictures)
This wreath looks so pretty for the little time that you spent on making it. It’s a fun and cheap way to add color to the door. But I wish you had used glazed paper instead of book pages.
ReplyDeleteThis is a very good use of extra useless papers by transforming it into a decoration with just coloring it.I will also try this.
ReplyDelete